When your car battery dies, it's easy to assume that the battery is the problem. However, the alternator may actually be the culprit. The alternator is responsible for charging the battery and powering the electrical components of your car. If it's not working properly, your car won't start or may stall while driving. Here's how to test your alternator to see if it's functioning correctly.

Step 1: Check Your Battery
Before testing your alternator, you need to make sure your battery is fully charged. If your battery is dead or low on charge, your alternator test results will not be accurate. Use a voltmeter to check the voltage of your battery. A fully charged battery should read around 12.6 volts. If it's below 12 volts, charge the battery before proceeding with the alternator test.
Step 2: Start Your Engine
Once your battery is fully charged, start your engine and let it run for a few minutes. This will allow the alternator to charge the battery and power the electrical components of your car. If your car won't start, jump start it or use a battery charger to get it running.
Step 3: Turn On Your Lights
With your engine running, turn on your headlights and other electrical components such as the radio and air conditioning. This will put a load on the alternator and make it work harder. If your alternator is not functioning properly, your headlights will dim or flicker when you turn on other electrical components.
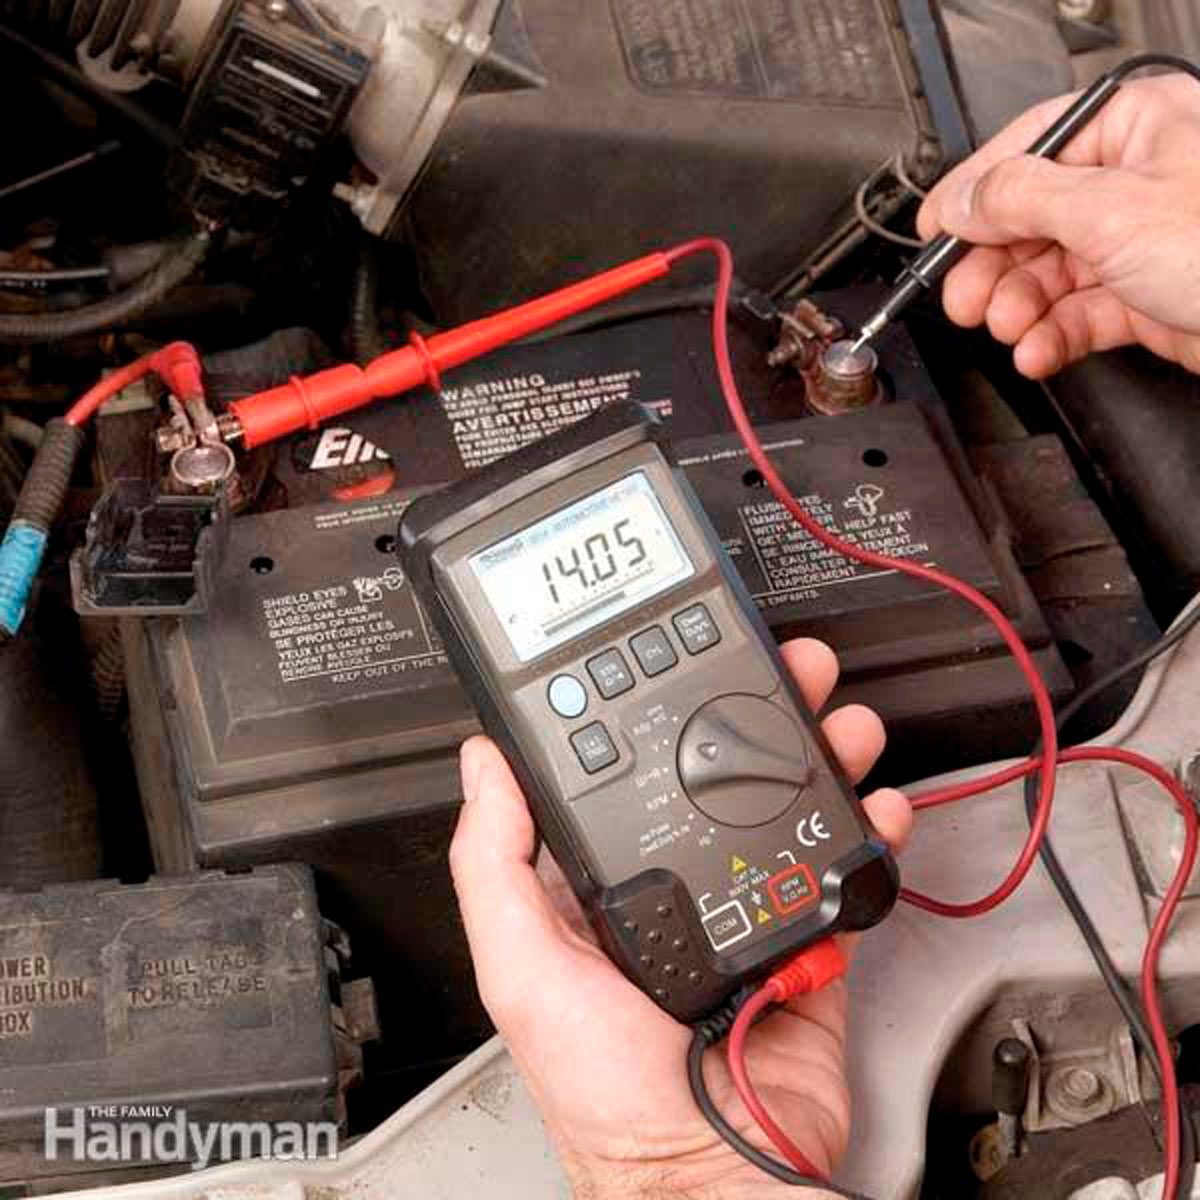
Step 4: Check the Voltage
Use a voltmeter to check the voltage of your alternator. You can do this by connecting the voltmeter to the battery terminals while the engine is running. A functioning alternator should read between 13.5 and 14.5 volts. If the voltage is below 13 volts, your alternator is not charging the battery properly.
Step 5: Check the Diode
The diode is a component of the alternator that prevents electrical feedback and keeps the battery from draining when the engine is off. To check the diode, use a multimeter set to "diode test" and touch the positive lead to the positive diode and the negative lead to the negative diode. If the diode is functioning properly, it should read between .5 and .7 volts. If it reads 0 volts, the diode is not working and needs to be replaced.

Step 6: Check the Belts
The alternator is driven by a belt that connects it to the engine. If the belt is loose, worn or broken, the alternator will not function properly. Check the belt for signs of wear such as cracks or fraying. Tighten or replace the belt if necessary.

Conclusion
Testing your alternator is a simple process that can save you time and money. If your alternator is not functioning properly, it can cause your battery to die and leave you stranded. By following these steps, you can determine if your alternator needs to be replaced or if there is another issue with your car's electrical system. Don't ignore the warning signs of a faulty alternator, take action and get it fixed before it's too late.